


Your ZX Spectrum - How to Get it Running
Below are some useful commands and instructions that will soon have you up and running again on your beloved Spectrum!
 Connecting to a television
 RGB/Component - this offers the highest quality image output, as it separates out the red, green and blue colour signals (where composite “blends” them together into the same signal).
All Spectrum models apart from the 16K, 48K and + are able to output an RGB signal. On the Spectrum 128 and +2 (grey), a combined composite and RGB output is available from the DIN socket marked "RGB/Peritel". Note that the wiring in these is different from the later +2A/B (black) and +3 models, so a cable that is designed for the 128 or +2 (grey) will not work on the later black +2 or +3 models and can damage your computer or the TV it's connected to!
 Composite – All Spectrum models actually create a pretty good quality composite signal which is then fed into the RF modulator. This is why the ‘composite mod’ is such a good idea – the signal simply bypasses the RF modulator, thus eliminating the need to tune your TV into it.
Spectrum 128 and +2 (grey) models came with a dedicated video output socket which outputs both composite and RGB signals. Many modern TVs that have a SCART socket support RGB signals into this socket, but if there's more than one SCART socket often only the first one supports RGB whereas the others support only composite signals.
 RF/UHF - Uses the Spectrum’s built-in RF modulator to transmit the image over a given frequency, which the TV is tuned-in to pick up. UK and European ones were tuned to transmit at between 603.25 and 607.75 MHz. For US models, you tuned into channel 36.
This was the only option for 16K, 48K and Spectrum + models, but the ‘composite mod’ can be done on all these to improve image quality.
Here's a summary of your options when connecting a ZX Spectrum to a TV:
| Model | RF/UHF | Composite | RGB |
| ZX Spectrum 16K or 48K | ● | ●1 | ○ |
| ZX Spectrum + | ● | ●1 | ○ |
| ZX Spectrum + 128 | ● | ● | ● |
| ZX Spectrum +2 (Grey) | ● | ● | ● |
| ZX Spectrum +2A/B (Black) | ● | ● | ● |
| ZX Spectrum +3 | ● | ● | ● |
*1 Requires the 'composite mod'
Spectrum 16K, 48K, +
 The original 16K, 48K and Spectrum+ models had one means of displaying the computer's output: RF, also commonly called UHF. Simply connect the RF/UHF lead from your Spectrum directly into the back of your television, where the aerial would normally be connected.
The picture to the right shows a typical RF lead, also referred to as a UHF or aerial lead, like the one originally supplied with your computer. The left plug in the picture goes into the television, and the right plug goes into the back of the Spectrum. If you don't have one of these they are available in all good electrical retailers or buy one from an online auction site, such as Ebay.
Older LCD televisions do still have an RF input on the back , but large LCD, LED, OLED and Plasmas tend not to. If you are unfortunate to own one of these newer televisions (!), it may still have other analog video inputs such as RGB component video or SCART sockets - these can take an analog signal like the RF output signal the computer is sending, but will need an adapter to convert the RF signal to either SCART or component video (RGB).
Once connected, you will need to tune one of the television's channels to the same frequency being output by the Spectrum. If you have a UK/European model Spectrum, this frequency is between UHF 603.25 and 607.75 MHz. In the US, set your channel to be 36.
There is a tried and tested home modification for these older Spectrums which provides composite video output from the RF socket. Click here for a good guide on how to modify your old Spectrum, complete with photos that take you through every step. The key advantage of this mod is that you no longer have to tune your television into the Spectrum's UHF frequency, so if your television is struggling to locate the Spectrum's video frequency, we'd highly recommend doing this mod.
Spectrum 128 or +2 (Grey model)
 These models improve the display quality over the previous 16K, 48K and '+' models with the introduction of a dedicated socket that outputs composite video and RGB signals. For backward-compatibility they also have the 'TV' socket which uses an RF/UHF lead that can be connected to your TV's aerial socket and tuned in.
The best way to connect either a Spectrum 128 or Spectrum +2 to your television is to use an RGB cable. This will produce the clearest picture, and avoids the need to tune the TV channel into a specific frequency.
IMPORTANT! An RGB cable for the 128 and +2 (grey) models is completely different (and incompatible) with an RGB cable for the later Spectrum +2B and +3. Using the wrong cable can damage your TV and/or the Spectrum.
The picture to the right shows the type of cable that will work for the UK model 128 and +2 (grey), with an 8-pin DIN plug (for video) and [optionally] a 3.5mm jack plug (for audio) on one end, and a SCART plug on the other. This cable offers both video and audio, and has some passive circuitry built-in to ensure both normal and 'BRIGHT' colours are detected.
Note that the Spanish 128's composite signal goes from SCART pin 20 to DIN plug pin 3 and pin is not connected, whereas and UK model goes from SCART pin 20 to DIN plug pin 1 and pin 3 is not connected. Therefore Spanish 128s will require either a spanish RGB cable or you will need to alter the internal connection inside the DIN plug. The RGB signal pinouts are the same for both UK and Spanish models.
For the video side of things, connect the DIN plug to the RGB socket on the back of your Spectrum, and the 21-pin SCART plug into the back of your television.
For the audio side, these cables may come with a 3.5mm jack plug since these Spectrum models didn't have a built-in speaker - they're designed to send all audio signals to your TV so you can control volume using a remote control. However, there are differences between the Spectrum 128 and +2 (grey). For the +2 (grey), simply connect the 3.5mm jack plug into the socket marked 'Sound' on the back of the +2. For the Spectrum 128, connect the 3.5mm jack plug to the 'MIC' socket on the side of the computer. The audio is sent to the TV's SCART socket, so no further connection is necessary.
Once everything is connected, it's a good idea to test that both audio and video are working well. Fortunately, the Spectrum 128 and +2 models come with a built-in tester - just hold down the BREAK button and switch on. You should see a test screen showing '1986' on a background of all available colours including the 'BRIGHT' versions and a tone that goes on for 1 seconds and goes off for 1 second repeatedly.
Spectrum +2A/B and +3 (Black models)
 Similar to the 128 and +2 (grey), these models have both an RF (UHF) output and a dedicated RGB socket. RGB cables designed for the +2A, +2B or +3 (the black models) are incompatible with the earlier Spectrum 128 and +2 (grey) models. The RGB signals are more in line with the Amstrad CPC range.
The picture to the right shows the type of cable that will work for the +2A, +2B and +3, with an 8-pin DIN plug on one end and a SCART plug on the other. The cable shown offers only video (no audio), but you can find cables that handle both - just make sure they are designed for the +2A, +2B and +3.
For the video side of things, connect the DIN plug to the RGB socket on the back of your Spectrum, and the 21-pin SCART plug into the back of your television.
For the audio side, these cables may come with a 3.5mm jack plug since these Spectrum models didn't have a built-in speaker - they're designed to send all audio signals to your TV so you can control volume using a remote control. If your cable has this audio jack plug, simply connect it into the socket marked 'Tape/Sound' on the back of the computer. The audio is sent to the TV's SCART socket, so no further connection is necessary. For cables that don't have the 3.5mm jack plug, you need to connect the 'Tape/Sound' socket on the back of the computer to either some external speakers or to an audio input on your television using a separate 3.5mm audio cable. Your TV may have one of two audio inputs, usually either a single 3.5mm jack socket or two RCA phono sockets for left and right. Bear in mind these Spectrums output mono sound, so you won't get stereo sound output on the TV.
Once everything is connected, it's a good idea to test that both audio and video are working well. Fortunately, the Spectrum 128 and +2 models come with a built-in tester - just hold down the BREAK button and switch on. You should see a test screen showing '1986' on a background of all available colours including the 'BRIGHT' versions and a tone that goes on for 1 seconds and goes off for 1 second repeatedly.
 Connecting a Cassette Recorder
Almost all ZX Spectrum models store programs on tape (audio cassette). The Spectrum +3 model also allowed storage onto 3" floppy disks, but almost no commercial software was sold on 3" floppy disk - 99% of games and other software for the ZX Spectrum were sold on tape.
Loading Software
If you don't have a traditional cassette recorder, any will do, as long as it has a headphone socket so the audio output can be sent externally. This is usually a 3.5mm jack socket on the side of the unit. Connect it to the Spectrum's "EAR" socket - this is used to play tapes "into" the Spectrum.
Saving Programs
To record anything to tape, you will also need to connect the cassette recorder to the Spectrum's MIC socket.Check on your cassette recorder for an input/aux connector - this will receive input from an external source (in our case, the Spectrum!) so that when you press REC or REC/PLAY it will record whatever is being received.
Typically this will be either a 2.5mm jack socket or a 3.5mm jack socket, which is the same type as on the Spectrum end. If it's a 2.5mm, you'll need an adapter cable to convert 3.5mm down to 2.5mm.
 Connecting up the Power
The Spectrum takes power off the 240V AC mains via it's own external transformer which converts it down to 9V DC.

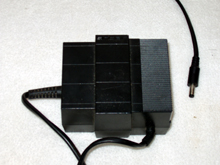


Plug the power supply into the mains, and then plug the other end into the back of the Spectrum. The 16K, 48K, Spectrum + and 128 have a standard small power plug with the centre being negative, outside being positive, but the +2/A/B and +3 all use a different power supply with a DIN plug on the end.
 Power On !
Now you're ready to power up. No Spectrums have an on/off switch - simply by plugging in the power lead, you've switched it on. Once you've switched on the Spectrum, and got it tuned in, you will see a screen like one of the ones below:


If you see a menu, you can use the up/down arrow keys on your keyboard to navigate and press ENTER to choose the option. The "Tape Loader" or "Loader" gives you the convenience of hitting ENTER and pressing PLAY on your cassette recorder to start loading software. "128 BASIC" or "+3 BASIC" gets you into the more up-to-date version of BASIC that doesn't have single-click commands. All Spectrums have the original single-click command interpreter (either automatically on startup as you see in the top-left screen above, or by selecting "48 BASIC" from the menu and hitting ENTER).
 Loading Software
Insert the cassette you want to load into the cassette recorder.
For the original 16K, 48K and Spectrum+, the Sinclair BASIC had a very neat shorthand so that single-keypresses would type out entire keywords. For these computers, hit "J", followed by holding down Symbol Shift and hitting P, then hold down Symbol Shift again and hit P:

For the Spectrum 128, +2 and +3, you need type in L-O-A-D "" in full.
This should result in the screen showing:
LOAD ""
Hit enter and press play on the cassette recorder. If all goes well, you should hear and see the tape loading, with the cyan and red lines in the border, following by yellow and blue lines, for example:-

Depending on the size of program being loaded, up to approx. 4 minutes will be needed before the program has loaded. Some very old programs as well as BASIC programs require you to do a "RUN" <enter> to actually run the loaded program once loading has finished.
If it seems to struggle, try adjusting the cassette recorder's volume or tone controls (if you have them), or try forwarding the cassette to the end and play the other side. Most commercially bought tapes contained identical content on both sides of the tape.
Usually a program is loaded in 'blocks', and these are made up of something like:
Program: frogger
Screen: frogger
Bytes: frogger
<loaded>
Every block that gets loaded has a 'header' which consists of a red and cyan striped border. The header is followed by the data itself which usually appears as yellow and blue striped/scrambled horizontal lines. All data loads with a tone or screeching noise - this is perfectly normal. A program cannot begin loading with a 'Bytes' block. If is shows it reading this first, rewind some more and try again until you see "Program:" appear.
Saving to Tape
Make sure you plugged in the MIC lead into your Spectrum's MIC input and the other end into your tape recorder's MIC or AUX input socket, otherwise it won't record!
If you've written a program in BASIC that you want to save to tape, just type for example:
SAVE "frogger"
Hit ENTER, then hit record (or possibly record and play together) on the cassette recorder. You should see the screen start to save your program. When it's done, you'll see an "OK" message.
Other Useful Commands
| To do this: | Type this: |
| reset the Spectrum (when in BASIC) | NEW |
| to load a program from tape | LOAD "" |
| to run a program | RUN |
| to list the contents of your program | LIST |
| change the colour you write text in | INK <colour from 0-15> |
| change the colour of the border | BORDER <colour from 0-15> |
| change the colour of the middle bit of the screen | PAPER <colour from 0-15> |
| assigning a value to a variable | LET a=10 |
| assigning a string to a variable | LET a$="Hello world" |
| peek at the value at a specific memory address | PEEK addr |
| poke a new value into a specific memory address | POKE addr, value |
 Spectrum +3-only Commands (Disks)
When switched on, the Spectrum +3 automatically looks for a file on the inserted disk called "*". This program cannot be produced by BASIC. If found, it loads and runs. If not found, it then tries to load and run a program called "DISK". If this is not found either, it gives up and returns to the user.
| To do this: | Type this: |
| to load from tape in +3 mode | LOAD "T:" |
| to list the contents on tape in +3 mode | CAT "T:" |
| to load from disk 1 (the built-in disk drive) | LOAD "A:frogger" |
| to load from disk 2 (the external disk port on the back) | LOAD "B:" |
| to load from RAMdisk | LOAD "M:" |
| to save to disk 1 | SAVE "A:frogger" |
| to copy from tape straight to disk | LOAD "T:fred": SAVE "A:fred" |
| to get extended info about what's on a disk | CAT EXP |
Please get in touch if you have any helpful instructions that you wish to share, and we'll add them to the list.